Digital Fabrication

By Merit Ashraf Categories: UCS
Wishlist Share
Share Course
Page Link
Share On Social Media

About Course

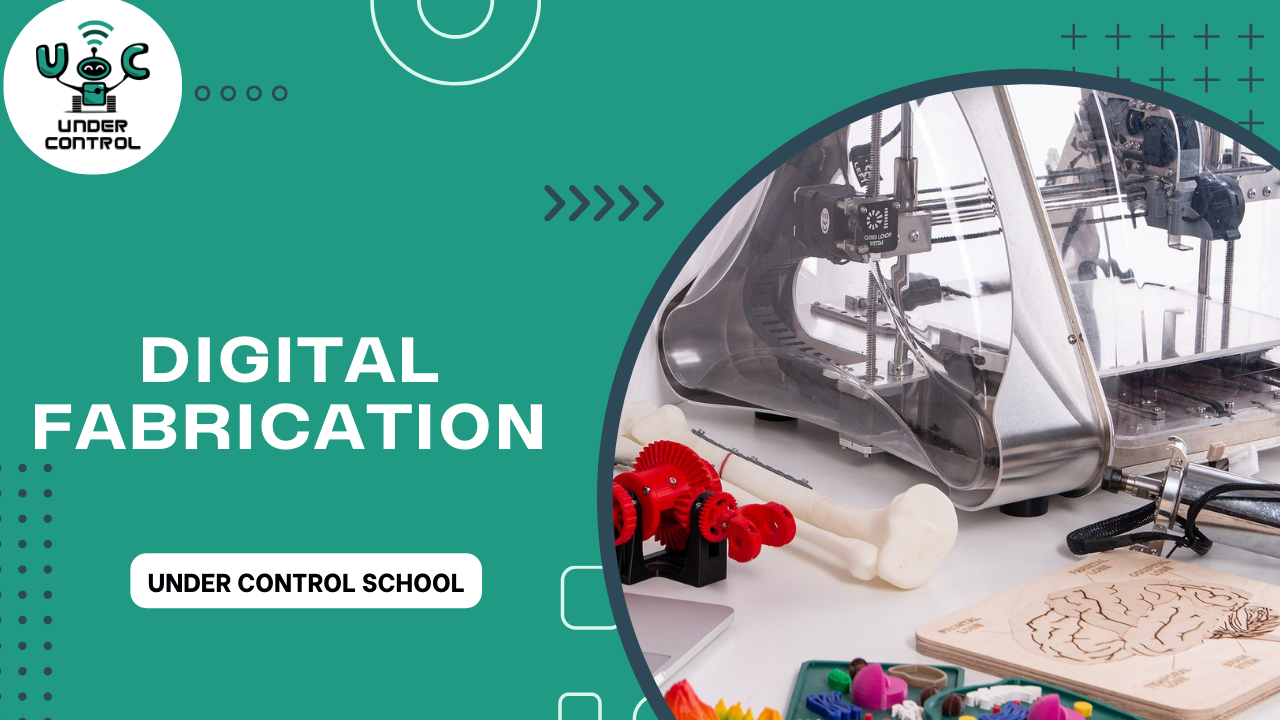
Digital fabrication, also known as computer-aided manufacturing (CAM), is a revolutionary manufacturing process that combines advanced computer technologies with traditional fabrication techniques. It encompasses a range of modern methods, such as 3D printing, CNC machining, laser cutting, and additive manufacturing, enabling the creation of intricate and precise physical objects from digital designs. The process begins with a digital 3D model, created using computer-aided design (CAD) software, which is then translated into machine-readable instructions. These instructions guide computer-controlled machines to shape, cut, or add materials, bringing the digital design to life. Digital fabrication offers numerous advantages, including rapid prototyping, customization, reduced waste, and the ability to produce complex geometries that were once difficult or impossible to achieve through conventional manufacturing methods. As technology advances, digital fabrication continues to revolutionize industries ranging from aerospace and automotive to fashion and medicine, driving innovation and shaping the future of manufacturing.machines

Show More

What Will You Learn?

  • First, we will learn a little about the meaning of 3D printing and its history
  • Then comes the study of the types and materials used
  • We delve deeper into the study of the printer and its parts, then comes the mechanical part of it, and finally we learn the part of exporting the G code

Course Content

Introduction

  • Welcome
  • Caution
  • Certification Details

3D printing History
In the 1990s, 3D printing found its initial niche in rapid prototyping, allowing engineers and designers to quickly produce physical models of their designs, significantly accelerating the product development process.

Types of printers and materials used
Continuous advancements in 3D printing technology, such as Selective Laser Sintering (SLS), Stereolithography (SLA), and Digital Light Processing (DLP), improved speed, accuracy, and material capabilities.

Machines
3D printing machines, also known as 3D printers, are revolutionary devices that use additive manufacturing techniques to create three-dimensional objects from digital designs. These machines have played a pivotal role in transforming various industries, from prototyping and manufacturing to medicine and aerospace

Mechanical parts
In the context of 3D printers, mechanical parts refer to the various components that make up the machine's structure and enable its movement and functionality. These parts are critical for the precise operation and accuracy of 3D printers in creating three-dimensional objects.

G Code
G-code, short for "Geometric Code," is a programming language used in computer numerical control (CNC) machines, including 3D printers, mills, lathes, routers, and more. It consists of a series of commands written in plain text that instruct the CNC machine on how to move its tooling or print head to create a physical object based on a digital 3D model.

AutoCAD Interface sitting
The AutoCAD interface settings provide users with the flexibility to tailor their workspace according to their preferences and workflow needs. Users can customize the interface by arranging toolbars, palettes, and panels, adjusting color schemes, and choosing display options. The "Workspace" feature allows users to switch between predefined interface layouts optimized for different tasks, such as drafting, 3D modeling, or annotation. Additionally, users can create their own custom workspaces by adding or removing interface elements, creating shortcut keys, and setting up tool palettes for quick access to frequently used commands. This level of interface customization empowers users to create a workspace that enhances their efficiency and productivity while working within the versatile and dynamic environment of AutoCAD.

Propites Setting In autocad
In AutoCAD, property settings play a pivotal role in defining the characteristics and attributes of various elements within a drawing. These settings enable users to precisely control the appearance and behavior of objects, lines, text, dimensions, and more. By accessing the "Properties" palette or using the "Properties" command, users can modify properties such as color, line type, lineweight, layer assignment, and text styles. This level of customization allows for consistent and standardized design presentations, ensuring that all elements adhere to specific visual and technical standards. The property settings also extend to 3D objects, enabling users to define material properties, lighting conditions, and rendering options to achieve realistic and visually compelling models. In essence, the property settings in AutoCAD provide a powerful means for users to fine-tune and harmonize the visual and functional aspects of their designs, contributing to efficient workflows and the creation of professional-grade drawings and models.

Draw List In autocad
In AutoCAD, a draw list serves as a comprehensive record or inventory of the various drawings and files associated with a particular project or design. This organized list provides essential information about each drawing, such as its title, description, creation date, author, and file location. The draw list acts as a reference tool, helping users quickly locate and access specific drawings within a project. It aids in project management, version control, and collaboration, allowing team members to keep track of changes, updates, and dependencies between different drawings. With the draw list, design professionals can efficiently navigate their projects, ensure consistency across drawings, and maintain a structured approach to their work, ultimately contributing to better organization and streamlined design processes.

Modifia List in autocad
In AutoCAD, a modification list is a crucial record that tracks and documents changes made to a design or drawing over time. This list provides a detailed account of modifications, including alterations to specific elements, objects, dimensions, and annotations within the drawing. It captures information such as the date of modification, the user responsible for the change, and a description of what was modified. The modification list is an indispensable tool for maintaining an accurate history of design revisions, enabling users to review, analyze, and understand the evolution of a project. It serves as a valuable reference for project management, collaboration, and quality control, ensuring that all stakeholders are informed about the changes made to the design and allowing for effective decision-making throughout the design process. The modification list enhances transparency, reduces errors, and contributes to the overall efficiency and accuracy of design workflows in AutoCAD.

Anotation List
In AutoCAD, an annotation list is an essential component that catalogues and manages textual and graphical annotations within a drawing or design project. These annotations can include notes, labels, dimensions, callouts, and other forms of explanatory or descriptive information. The annotation list provides a centralized overview of all annotations present in the drawing, complete with details such as the annotation type, content, location, and associated properties. This tool is particularly useful for maintaining consistent and organized documentation, as it ensures that important information is readily accessible and easily traceable. Design professionals can efficiently review and edit annotations, ensure accuracy in labeling and dimensioning, and make informed decisions based on the contextual information provided. The annotation list promotes clear communication, simplifies collaboration among team members, and contributes to the overall clarity and comprehensiveness of the design documentation process within AutoCAD.

Download fusion and Introdaction
The intro video for Fusion 360 is likely to be a short presentation that showcases the main features and capabilities of the software. It may start with an overview of what Fusion 360 is and how it can be used in various industries, such as mechanical engineering, product design, architecture, and more. The video might highlight the key benefits and advantages of using Fusion 360 for 3D modeling, simulation, and manufacturing.

Creating sketches in fusion
Creating sketches is a fundamental step in the design process using Fusion 360, a 3D computer-aided design (CAD) software. Sketches serve as the foundation for 3D models and allow designers to define the shape and geometry of objects

Modifay 2D Sketch in fusion
After creating a sketch, users can easily modify and edit it. Fusion 360 offers tools to add, delete, or edit sketch entities, as well as adjust constraints and dimensions.

Pattern & Text in fusion
Fusion 360 provides tools to create various patterns based on the sketch elements, such as linear patterns, circular patterns, and mirror patterns ,In addition to your capabilities to write text on your design

Creat 3D Componant
Once a sketch is complete, it can be used as a base to create 3D features. Two common operations are extruding and revolving the sketch to generate 3D solids.

modify in 3D
Use the available tools and commands in the toolbar and "Modify" menu to make the desired changes to the component. The specific modification options will depend on the complexity of the component and your design intent. If you want to resize the component, use the "Scale" or "Move" command to adjust its dimensions or position. To edit specific features of the component, use the "Edit Form" or "Edit Feature" commands, which allow you to modify individual surfaces or solid bodies. If you need to add or remove material from the component, consider using "Extrude," "Cut," or "Join" operations to create new features or subtract material.

make componant without a skitch
n Fusion 360, you can create a 3D component without using a sketch by directly employing various 3D modeling tools

insert image in fusion 360
t's important to note that the image will not become part of the 3D model; it is merely used as a reference for sketching. If you need to incorporate the image as part of the 3D design, you will have to create features based on the sketch or directly model them using other Fusion 360 tools.

Pattern and mirror in 3D
Fusion 360 provides tools to create various patterns based on the body elements, such as linear patterns, circular patterns, and mirror patterns.

ASSEMPLE & APPERANSE AND EXPORTS
f you are working on an assembly, you can create multiple components and use the "Assemble" tools to position and join them together.

Downloading Cura Software
Downloading Ultimaker Cura software is the first step to unlocking a world of 3D printing possibilities. As an open-source slicing software, Ultimaker Cura is freely available for Windows, macOS, and Linux, ensuring accessibility to a wide range of users. To begin the download process, simply visit the official Ultimaker website and navigate to the Cura section. There, you can find the latest version of the software and select the appropriate installer for your operating system. Once the download is complete, installation is typically straightforward and guided by on-screen instructions. Ultimaker Cura's user-friendly interface and regular updates make it a popular choice for 3D printing enthusiasts and professionals alike. By downloading this powerful slicing software, you gain the tools and flexibility to prepare and optimize your 3D models, turning your creative visions into tangible and precision-crafted objects.

Cura Interface
The interface settings in Ultimaker Cura software offer users a high degree of customization and control over their 3D printing experience. Upon launching the software, users are greeted with a clean and intuitive interface, designed to streamline the slicing process. In the "Preferences" section, users can adjust the appearance of the interface, such as choosing between light and dark themes, adjusting the font size, and enabling or disabling various interface elements. Additionally, Ultimaker Cura allows users to customize the layout of the main window, rearranging panels to suit their workflow preferences. From the "Settings" menu, users can access an extensive array of print parameters, categorized into simple, advanced, and expert modes, catering to users of different skill levels. These settings enable precise control over print quality, speed, infill, support structures, and much more, empowering users to optimize their prints for specific needs and materials. With an interface that accommodates both simplicity and depth, Ultimaker Cura ensures that users can easily navigate through the vast array of settings, unlocking the full potential of their 3D printers and achieving exceptional results with every print.

Quality and wall
In Ultimaker Cura software, the quality and layer settings play a crucial role in determining the outcome of a 3D print. These settings allow users to strike a balance between print quality and printing time, tailoring their prints to meet specific requirements. In the "Quality" section, users can adjust parameters such as layer height, wall thickness, and infill density. A smaller layer height results in finer details and smoother surfaces but increases print time. Conversely, a larger layer height reduces print time but may sacrifice some surface quality. The "Walls" settings control the number of perimeters, affecting the thickness and strength of the print's exterior. By adjusting these settings, users can reinforce the structural integrity of the print or opt for a lighter, faster print. Additionally, the "Infill" settings determine the density of the interior structure, affecting the print's strength and material usage. High infill percentages create robust prints, while lower percentages save material and time, making them ideal for less demanding applications. Fine-tuning quality and layer settings in Ultimaker Cura empowers users to achieve the desired balance between print speed and impeccable print quality, producing 3D prints that meet their unique needs and specifications.

Top bottom and Infill
In Ultimaker Cura software, the "Top/Bottom" and "Infill" settings are essential parameters that directly impact the strength, durability, and overall quality of 3D prints. The "Top/Bottom" setting controls the thickness of the solid layers at the top and bottom surfaces of the print. Increasing the number of solid layers enhances the print's structural integrity, sealing the object and preventing gaps in the top and bottom surfaces. This results in smoother and more robust prints, ideal for objects requiring airtight or watertight properties. On the other hand, reducing the number of solid layers reduces print time and material usage, suitable for objects where surface smoothness is not a critical factor. The "Infill" setting, on the other hand, dictates the density of the interior structure of the print. A higher infill percentage creates a denser and stronger print, well-suited for load-bearing components or objects requiring extra strength. Lower infill percentages save material and shorten print times, suitable for objects with less structural demands. Balancing the "Top/Bottom" and "Infill" settings in Ultimaker Cura allows users to optimize the print's strength, weight, and overall quality, tailoring their 3D prints to meet specific functional and aesthetic requirements with precision and efficiency.

Material
In Ultimaker Cura software, the material settings are a fundamental aspect of the slicing process that allows users to tailor their 3D prints to the characteristics of the chosen printing material. Within the material settings, users can specify various parameters, including printing temperature, print speed, retraction settings, and cooling options, among others. The printing temperature is a crucial setting as it directly affects the material's flow and adhesion during printing. Different materials require different temperature ranges to achieve optimal results, and Ultimaker Cura provides pre-configured temperature profiles for various commonly used materials. Print speed influences the overall printing time and can be adjusted to balance between faster prints and print quality. Retraction settings help to control stringing and oozing issues during travel moves, ensuring cleaner and more precise prints. Cooling settings enable users to manage the cooling fan speed, critical for materials like PLA that require efficient cooling to prevent warping and improve print quality. With the ability to fine-tune material settings in Ultimaker Cura, users can unlock the full potential of their chosen 3D printing materials, achieving exceptional print outcomes that match their specific needs and material properties.

speed travel and support
In Ultimaker Cura software, the speed, travel, and support settings are crucial parameters that significantly influence the overall 3D printing process and the final print quality. The "Speed" settings allow users to control the speed at which the print head moves during different stages of the printing process. Adjusting the print speed can impact the overall print time and affect the print's surface finish. While higher speeds may lead to faster prints, they might compromise print quality and accuracy. The "Travel" settings govern how the print head moves between different parts of the print. By optimizing travel speed and retraction, users can minimize stringing and improve the print's overall appearance. The "Support" settings are vital when printing overhangs and complex geometries. Ultimaker Cura allows users to customize support structures to provide stability during printing, ensuring successful prints for challenging designs. By fine-tuning these speed, travel, and support settings, users can achieve a balance between print time and print quality, ensuring the best possible outcome for their 3D prints while minimizing potential printing issues.

colling and Build plate adhesion

Layers and export as PDF
In AutoCAD, layers are a fundamental organizational tool that allow users to manage and control the visibility, appearance, and properties of different elements within a drawing. Each layer can contain a specific set of objects, such as lines, shapes, and text, which can be grouped together based on their purpose or characteristics. This hierarchical structure provides a systematic approach to design, enabling users to work on different aspects of a project independently while maintaining overall coherence. When it comes to exporting a drawing as a PDF, the layer functionality in AutoCAD plays a crucial role. Users can selectively choose which layers to include or exclude in the PDF output, tailoring the presentation to suit the intended audience. This flexibility is especially valuable when sharing drawings with collaborators, clients, or stakeholders who may require different levels of detail. By exporting to PDF, the layers' visibility settings are preserved, allowing the recipient to toggle the display of specific layers on or off, enhancing the document's usability and ensuring that the conveyed information is both comprehensive and customizable. In essence, the seamless integration of layers and PDF export in AutoCAD contributes to effective communication, efficient collaboration, and the creation of well-structured and easily navigable design documents.

Certification

Student Ratings & Reviews

No Review Yet
No Review Yet